Overview
This article provides information on configuring which System Information from the list of conditions available in the Network and Software Options will be gathered while scanning with the modified Scanning Profile. This allows removing extra scanning time checks you are not interested in, which is especially helpful in the slow networking environments.
Solution
The System Information in the Scanning Profiles Editor defines the data collection, such as the OS (Operating System) information, a list of logged-on users, sessions, etc. To adjust the checks:
- Launch the LanGuard console.
- Go to Configuration > Scanning Profile Editor. Alternatively, press CTRL + P to launch the Scanning Profiles Editor.
- Go to Network & Security Audit Options > System Information.
- Select the appropriate scanning profile from the left pane under Profiles.
- On the right pane, expand the Windows System Information group or Linux System Information group accordingly.
- Select the Windows/Linux OS information the security scanner retrieves from scanned targets.
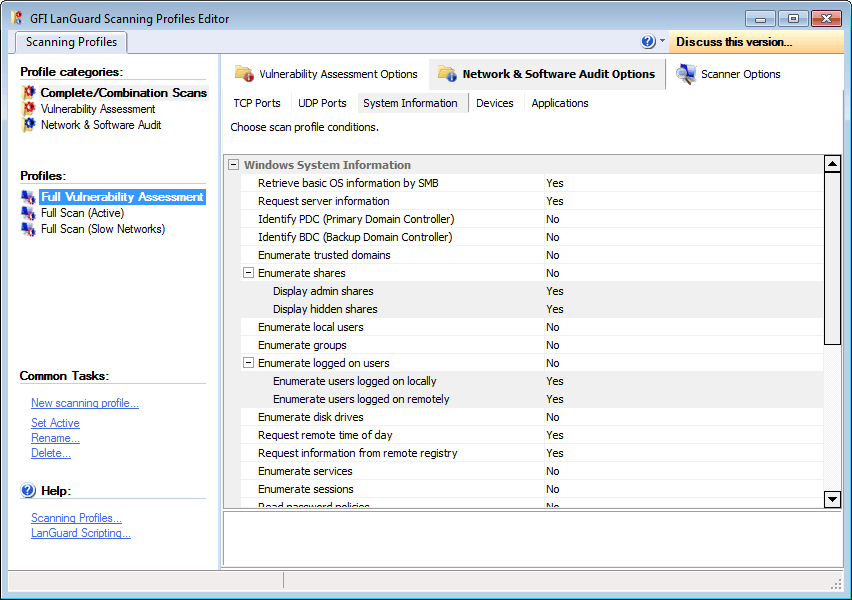
For example, to enumerate administrative shares in scan results, expand the Enumerate shares option, and set the Display admin shares option to Yes.
Related Articles
- Creating and Personalizing a Scanning Profile
- Configuring Vulnerabilities with Scanning Profile Editor
- Configuring Patches with Scanning Profile Editor
- Configuring TCP/UDP Port Scanning Options with Scanning Profile Editor
- Configuring Device Scanning Options with Scanning Profile Editor
- Configuring Applications Scanning Options with Scanning Profile Editor
Priyanka Bhotika
Comments